A mugful of pasta (any will do, but I like fusilli)
A large handful of Chestnut mushrooms (depends on how hungry you are)
Half a pack of spinach (this will wilt down)
1/2 a large onion, finely diced
3 cloves of garlic
Black pepper
A knob of butter
In a large pan of boiling water, add a pinch of salt and throw in your pasta. Cook it until its nice and tender and drain, BUT, make sure to keep the pasta water. It will become very important later! Rinse the pasta through with some cold water to stop it sticking together if the pasta is waiting a long time.
In a large frying pan (which has a lid), soften the onion with a good glug of olive oil
Slice you mushrooms into 1cm strips, half them, then add them to the pan with the butter. Add enough butter so that it coats the mushrooms, but not too much or the dish will become too greasy. Sweat the mushrooms by covering the pan with a lid
Add in the crushed garlic, stir until incorporated then add your spinach. Gently fold it into the mixture and cover with a lid so it can wilt down.
Add in the round of Boursin (chop it up first to make it easier to melt) and stir it into the veg mix. Add a serving spoons worth of pasta water to loosen it, then add more to get it to the consistency that you’d like for sauce.
Incorporate the drained pasta, make sure it’s all coated. Add some more water if the sauce becomes too thick.
Give a couple of good grinds of black pepper to the mix before serving immediately. Grating some parmesan on top helps give it some extra flavour if you’d like!
Simple and tasty.
This dish doesn’t take more than 15 minutes to make, and it can be eaten cold or hot the next day as leftovers. If you don’t like such an intense herby, cheesy taste, put in less Boursin.
This cake has no rules. You can add whatever dried fruit you like, make it as spiced as you need and it keeps for a while too. Its one of my favourites, and works well as a tea and cake situation, or warmed up with a little butter on it
INGREDIENTS
100g softened butter
50g caster sugar
50g germerara sugar (plus extra for the top)
2 large eggs
175g self-raising flour
1tsp ground cloves
1tsp mixed psice
1/2tsp ground cinnamon
1tsp freshly greated nutmeg
3 tbsp mixed peel
3 tbsp chopped stem ginger
50g red or natural glacé cherries
100g sultanas
100g currants (doubling up on sultanas works if don’t have any currants)
2 rounded tbsp chunky marmalade (1 for the mix, 1 for the glaze)
Splash of milk
METHOD
Preheat the oven to 160C/Fan 140C/Gas 3. Grease a 900g (2lb) loaf tin and line it with baking parchment or a loaf liner.
Cut the cherries into quarters, put in a sieve and rinse under running water. Drain well then dry thoroughly on kitchen paper. Place the cherries and all of the fruit, peel and ginger in a large freezer bag. Set aside for now.
Cream together the butter and sugar before adding the eggs one at a time along with a scoop of flour to make sure it doesn’t curdle. Take a tablespoon out of the remaining flour and add it to the freezer bag.
Add the spices to the flour and fold it into the mixture. Shake the closed bag until the fruit is thoroughly coated in flour, adding more if necessary and add to the mixture along with one tablespoon of the marmalade. Add a splash of milk if the mixture is too dry or thick.
Spoon into the loaf tin, spread to the edges and level the top. Sprinkle some demerara sugar on the top to add some extra crunch.
Bake in the preheated oven for about 1 1/2 hours or untul a skewer insterted into the centre of the cake comes out clean. It doesn’t matter if there’s a crack. If the top is browning too quickly, cover it with a tin foil hat. Leave to cool in the tin for 10 minutes then turn out, peel the parchment off and finish cooling on a wire rack.
To finish, warm the marmalade in a small pan and paint it over the top and sides of the cake, placing more on the top. Sprinkle some more demerara sugar on the top and leave to set. Let cool completely before cutting and serving.
I love this cake, and its pretty consistent when it comes to bake time and texture. Its a heavily fruited loaf, so can appear heavy but the texture is not dense if mixed properly. Tasty, and simple.
Subji consists of vegetables cooked with spices and curry flavors, and is best served with chapattis/naan and a dollop of yoghurt and mango chutney for good company. The spinach can easily be switched for Kale if you prefer a dryer subji
Serves 4, as a main (but also works as a side)
INGREDIENTS
1tsp Cumin Seeds
1 tsp Fennel Seeds
3 tbsp Rapeseed Oil
1 tsp black mustard seeds (nigella seeds also can work)
1 Onion, finely chopped
3 Cloves of Garlic, finely chopped
3 Leeks (500g), trimmed and finely sliced
600g Chesnut Mushrooms, quatered
1 3/4 tsp Chilli Powder
1/2 tsp Ground Turmeric
1 1/4 tso Salt
200g Spinach, chopped
150g Frozen Peas, defrosted
Method
Put the cumin and fennel seeds into a mortar, and bash until they’re fairly well ground
Heat the oil in a large frying pan for which you have a lid, then add the ground spices and the mustard seeds and stir-fry for a minute, until he cumin turns a shade darker.
Add the onion and cook, stirring often, for around 6 minutes or until soft. Then add the garlic and cook for 2 minutes more
Add the leeks and cook for around 5 minutes, until they’ve softened and unravelled, then add the mushrooms. It will seem as if there are too many to fit into the pan, but they will soon cook down.
After 5 minutes, when the mushrooms are juicy, add the chilli powder, turmeric and salt. Then add the spinach and cook for 8 minutes, until tender. Throw in the peas and cook for 2-3 minutes more, until they are hot and soft.
Check the subji for chilli and salt, adjust to taste, and serve.
This dish is very filling, and works great for something healthy and spicy, yet still quite quick. Tasty, and simple.
This dish was discovered when my family decided to go Vegetarian, and we haven’t looked back since. Its a really tasty, simple dish which goes great as a main dish, or as a side on curry night.
Serves 4 People
INGREDIENTS
100ml Rapeseed Oil
2 1/2 tsp Ground Coriander
2 1/2 tsp Ground Cumin
2 tsp Chilli Powder
1/2 tsp Garam Masala
1 1/2 tsp Salt
4 Cloves of Garlic, Crushed
2cm giner, peeled and grated or 1 tbsp lazy ginger
2 red onions, halved and cut into 1cm wdges
225g Paneer, cut into 2cm cubes
1 Medium Cauliflower (600g), broken into florets
300g Potatoes, peeled and cut into 2cm cubes
500g Vine Tomatoes, roughly chopped
Chopped Fresh Coriander and Lemon Wedges, to serve
METHOD
Preheat the oven to 180C fan/ 200C/ 400F/Gas 6 and line 2 large oven trays with foil
Next, make the marinade. In a small bowl, mix the oil, ground coriander, cumin, chilli powder, garam masala, salt, garlic and ginger, then set aside
Place the onions and Paneer on one tray, and the cauliflower and potatoes on the other. Pour an equal amount of the dressing over both trays, making sure you scrape every last bit out of the bowl and rub everything with your hands, making sure all vegetables are covered
Place the onion and Paneer tray at the top of the oven, and the cauliflower and potatoes in the middle. Roast for 25 minutes, or under the cauliflower and potatoes are tender and blackening, them remove both trays. Cover the cauliflower and potato tray to keep warm.
Add the chopped tomatoes to the onion and Paneer tray and return to the oven for another 15 minutes. After this time, remove from the oven and top the potatoes and cauliflower into the tomato tray. Gently mix and taste, adding a little more salt if you like. Can be transferred to a presentation bowl (as seen in photo)
Sprinkle with chopped coriander, squeeze over the lemon and serve alongside yoghurt, mango chutney and naan bread.
This dish has become one of my favourites, and has taught me not to be so afraid of Indian and South Asian cuisine (too spicy for me!). Even without the meat, its very filling and satisfying. Tasty and simple.
This is my Dad’s absolute favourite that takes him back to his childhood. This dessert takes time and a little care to execute, but is 100% worth it. Perfect for a summer evening
Time to Prepare: 2hr 20mins
Time to Cook: 40 mins
Number of Servings: 10
INGREDIENTS
For the Pastry:
225g Plain Flour
100g Butter, Cold & Diced
1 Tbsp Caster Sugar
1-3 Tbsp Cold Water
For the Filling:
2 Level Tbsp Cornflour
100g Golden Caster Sugar
125ml Fresh Lemon Juice (3 Lemons)
Juice of 1 Small Orange
85g Butter, cut into pieces
3 Egg Yolks
1 Whole Egg
For the Meringue:
4 Egg Whites, Room Temperature
200g Golden Caster Sugar
2 Level Tsp Cornflour
TOOLS NEEDED
Food Processor
Cling Film
Rolling Pin
23×2.5cm loose-bottom fluted flan tin
Sharp Knife
Fork
Baking Beans
Tin Foil
Cooling Rack
Large Saucepan
Spatula
Sieve
Jug
Balloon Whisk (electronic or manual)
Pie Slice
Method
Whiz all of the pastry ingredients together, adding the water spoon by spoon to ensure the dough is not too wet. Remove and form into a ball before tipping onto a lightly floured surface
Roll out until 0.5cm thick and line the tin. Trim and neaten the edges, pressing the pastry into the flutes. There will be workable excess left over, do not worry.
Prick the base with a fork, line the base with tin foil, shiny side down and cover with clingfilm. Chill for 1/2-1 hour (or overnight)
Put a baking sheet in the oven and heat oven to 200C/fan 180C/gas 6. Bake the pastry case ‘blind’ (filled with the baking beans) for 15 mins, then remove the foil and bake a further 5-8 mins until the pastry is pale golden and cooked. Set aside. This can be done a day ahead if you want to get ahead
If making the pastry the same day as serving, whilst the pastry is backing prepare the lemon curd filling. Mix the cornflour and sugar in a medium saucepan on a medium heat until it starts to melt. Add the lemon zest and stir consistently for around 5 minutes or until the sugar has melted completley. Strain and stir in the lemon juice gradually. Make orange juice up to 200ml/7fl oz with water and strain into the pan.
Cook over a medium heat, stirring constantly, until thickened and smooth. Once the mixture bubbles, remove from the heat and beat in the butter until melted. Beat the egg yolks and whole egg together, stir into the pan and return to a medium heat. Keep stirring vigorously for a few minutes, until the mixture thickens and plops from the spoon. (It will bubble, but doesn’t curdle.) Take off the heat and set aside while you make the meringue.
Heat the oven to 180C/fan 160C/gas 4. Put the egg whites in a large bowl. Whisk to soft peaks, then add half the sugar a spoonful at a time, whisking between each addition without overbeating. Whisk in the cornflour, then add the rest of the sugar as before until smooth and thick.
Quickly reheat the filling and pour it into the pastry case. Immediately put spoonfuls of meringue around the edge of the filling (if you start in the middle the meringue may sink), then spread so it just touches the pastry (this will anchor it and help stop it sliding). Pile the rest into the centre, spreading so it touches the surface of the hot filling (and starts to cook), then give it all a swirl.
Return to the oven for 18-20 mins until the meringue is crisp and slightly coloured. Let the pie sit in the tin for 30 mins, then remove and leave for at least another 1⁄2-1 hr before slicing. Eat the same day.
This will keep for the next day if refrigerated over night, however it is best on the same day it is cooked. The centre of the meringue is spongey whilst the top is crispy – just the way I like it. This doesn’t need to be served with any sort of cream or ice cream, but a few raspberries or other summer fruits wouldn’t be such a bad idea. Tasty, and simple.
A spin on the classic Jambalaya, minus the shellfish. I made this for my mum who can’t eat shrimp or prawns, and it was an instant hit. The ingredients listed are only rough estimates, as I judge this dish by eye
Method
Dice the onion finely. Cut the onion into 1x1cm cubes and peel the garlic cloves. Cut the chicken into large chunks, around 2.5×2.5 cm. Slice the Chorizo into this rounds, cutting them in half. Wash your rice to remove the starch and set to the side
Heat the oil in the pan on a medium heat. Add the chicken and brown for 5-8 minutes until golden on each side. Remove from the pan and set aside
Tip the onion into the still hot pan and cook for 3-4 minutes until soft and slightly brown. Turn the heat down slightly and add the pepper, chorizo and crushed garlic along with a few good shakes of Cajun seasoning, spiced to your liking. Cook for 5 mins more.
Stir the chicken back in, add the rice the rice and cover with the stock. Cover with lid and let simmer for 20-25 minutes until the rice is tender. Keep checking the dish every now and then to make sure the rice has enough water to cook (if not add more) and stir it to avoid the contents sticking. Serve straight from the hob and enjoy!
This is best served hot and is a great dish to serve to friends. For an extra kick (if the cajun spice isn’t quite enough for you) throw in a few splashes of tobasco for a more authentic Louisiana feel. Tasty, and simple.
I make this dish all the time at home, and it’s really easy to switch it up and make different each time without any added stress
Method
Dice the onion finely, slice the pepper into 2 x 2cm squares, cut the courgette into similair sizes and peel the garlic cloves. Remove the mushroom stalks and slice the heads horizontally before cutting them in half
Pour some olive oil in a large saucepan and head on a medium heat. When hot, add the onion
Soften the onion for 3-4 minutes before adding the pepper and courgette. Stir well then cover with the lif for a few minutes
Add the mushrooms to the pan with a generous knob of butter on top of the veg and turn the heat down slightly. Cover with a lid and let sit for a few minutes, checking and stirring occasionally to make sure nothing overcooks. There will be a sudden switch in the mushrooms’ texture and shine when they are ready. If this does not happen for a while, add some more butter (be careful with this so as to not add too much and make the dish greasy)
Boil the kettle with more than 500ml of water. Dissolve the stock cube in 500ml of boiling water.
Once the mushrooms are done, crush the garlic cloves and add them to the pan using a presser. At the same time, add a generous amount of curry powder (to taste) and a few good grinds of black pepper. No salt will be needed.
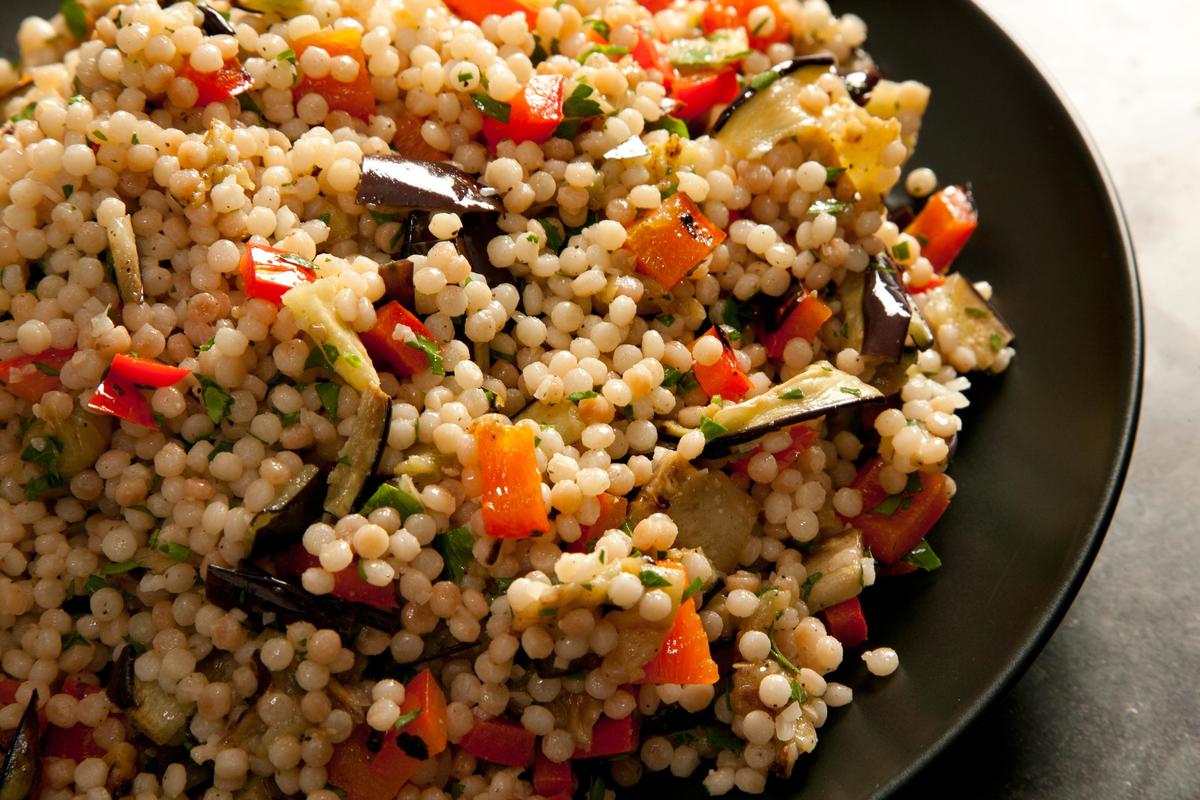
Add the couscous to the pan and cover with the stock. You may need to add a little more boiling water so that it covers all of the ingredients.
Stir the contents and cover with the lid. Let sit for around 10-15 minutes until the couscous is soft. If the liquid has cooked off and the couscous is still not ready, add some more boiling water. You will need to judge this by eye.
Add your extra ingredients if using them (see below) and serve straight away.
If Using Optional Ingredients:
These are only a few suggestions that I have tried in the past. As a flexible dish, anything goes!
For the Halloumi
Carefully slice the halloumi in 1.5cm wide slices. It breaks quite easily, so handle with care and use a sharp knife, avoiding the sawing action
Mix the flour, cayenne pepper and paprika together in a deep plate or bowl. Coat the halloumi in the mix and set to one side
Melt the butter in a frying pan at a high heat. Once melted, place the halloumi in and let fry until the bottom is crispy and brown. Then flip
Continue until all of the halloumi is cooked. In order to keep it hot whilst the couscous is cooking, turn the oven to 180C fan and place on a plate inside
To serve, lay the pieces of halloumi in a circle around the couscous until it almost resembles a sunshine graphic
For the Chicken
Dice the chicken into even cubes
Coat the chicken in the olive oil, saving a little for the pan
Toss the pieces in the chilli powder (there will be excess)
Heat the reamining oil in a frying pan at a high heat, but not hot enough to spit. Add the chicken and cook evenly on each side, cutting the largest piece in half to see if it is cooked through (all white with no pink showing)
Remove from the pan and place on a plate in a hot oven to keep warm whilst the couscous is cooking
Add to the dish and stir in just before serving
For the Goat’s Cheese
Dice into small cubes about 1.5 x 1.5cm wide
Add to the couscous about a minute before serving so that it is warm, but does not melt completely
For the Peas & Sweetcorn
Add to the dish just before you add the boiling water and stock. They should cook through at the same time as the couscous. Alternatively, you can add a pre-cooked mix to the dish a few minutes before the end to warm them through.
This dish will keep for the next day for a handy leftover lunch. If to your taste, you could add a handful of chopped parsley to create a more aromatic taste, but it’s entirely up to you. Equally, you can switch the onion for red onion, change the pepper used etc. It’s really up to you whether you want to add more colour or not. It’s a healthy dish with very little hassle and great for when you have friends around or are just cooking for you or your family. Tasty, and simple.
One cannot think well, love well, sleep well, if one has not dined well. – Virginia Woolf, A Room of One’s Own
Possibly one of the most truthful lines to ever come out of 20th Century literature that I certainly relate to very much. So, this website is dedicated to providing recipes that I have either collected or created, all of them being simple and tasty enough for anyone to achieve